

Creating an effective landing page can significantly boost your online conversion rates. In this guide, we’ll explore the step-by-step process of building a landing page using the WPBakery Page Builder, including essential features and design tips to enhance your web presence.
Getting Started with WPBakery
WPBakery Page Builder is a versatile tool for creating custom landing pages. To begin, ensure WPBakery is installed and activated on your WordPress site. Navigate to your WordPress admin panel, go to ‘Pages,’ and select ‘Add New.’ Here, you can choose to use the WPBakery front-end editor for a more visual page-building experience.
WPBakery offers two editors: the back-end editor and the front-end editor. For this guide, we’ll use the front-end editor to build a landing page from scratch. This approach allows for a more intuitive and visual design process.
Creating Your First Landing Page
Start by creating a new page in WordPress. In the WPBakery front-end editor, you can choose to begin with a blank page or a predefined template. For this tutorial, we’ll use a blank page to have complete control over the layout and design.
The basic structure in WPBakery consists of rows and columns. Rows form the horizontal sections of your page, which can be divided into multiple columns. Content elements are then placed within these columns.
Setting Up the Page Structure
Begin by adding a row to your page. At the top of each row, you’ll find controls to edit, clone, or delete the row. For our landing page, we’ll set the row stretch options to ‘stretch row.’ This will ensure the row spans the full width of the page while keeping the content boxed.
Each row can have different design options such as margin, padding, border, background color, and background image. For our first row, we’ll add a background image to enhance the visual appeal.
Next, split the row into two columns. WPBakery allows you to choose from various column configurations or enter custom values. For simplicity, we’ll split the row into two equal columns.
Adding Rows and Columns
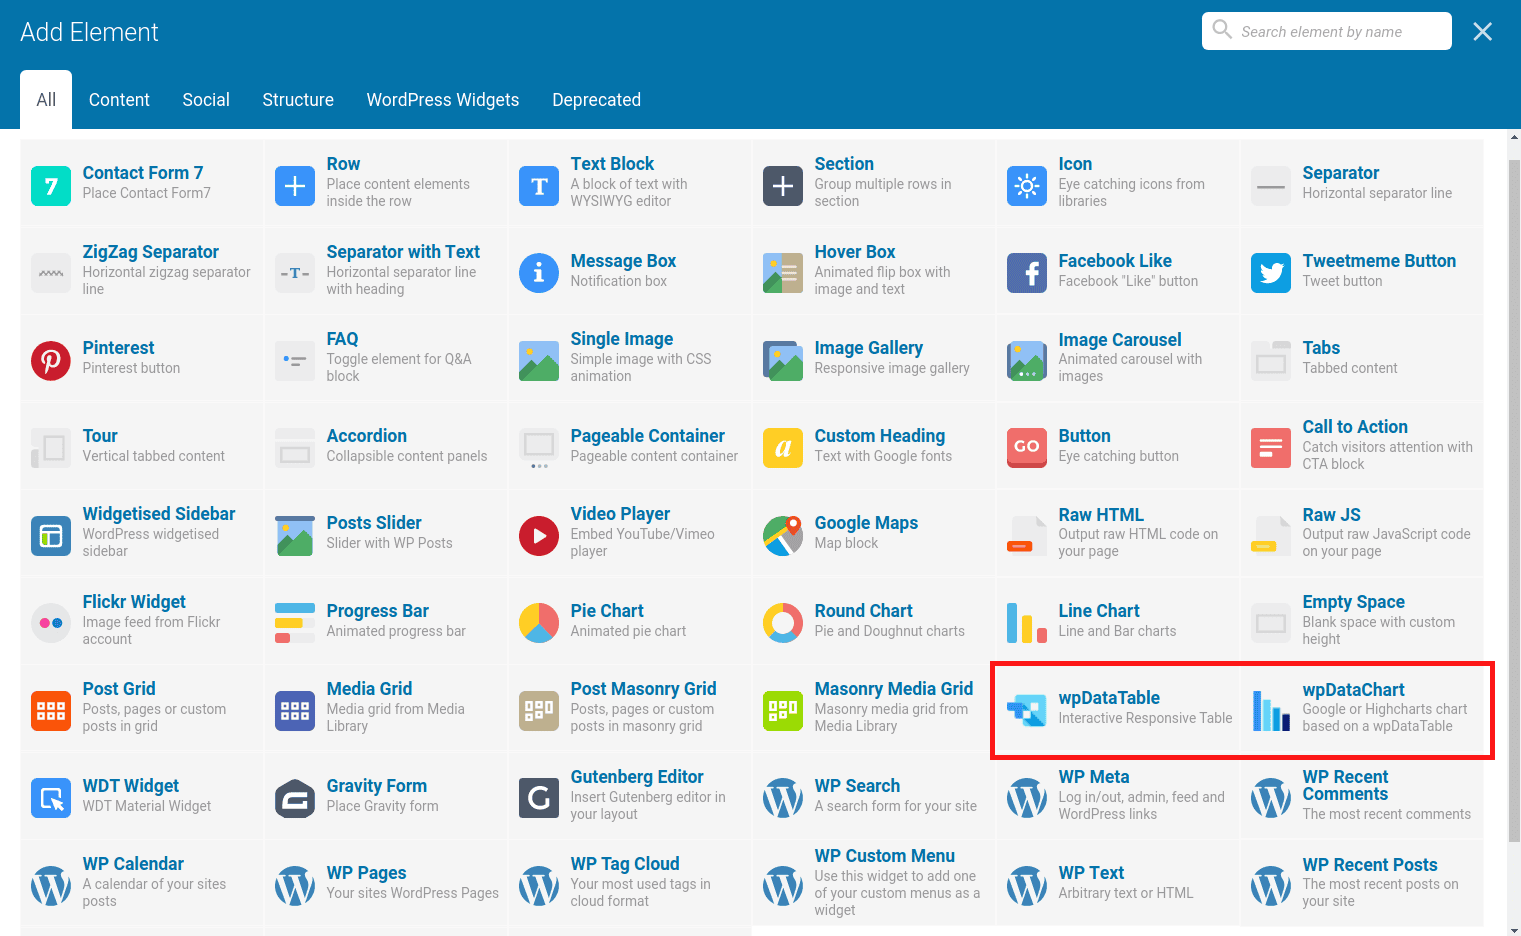
With the basic structure in place, it’s time to add content elements. Click the plus icon in a column to see the available elements. We’ll start by adding a company logo using the single image element. You can upload an image from your media library or use an external link.
For best results, use images that are already sized appropriately. You can adjust the image size within WPBakery, but pre-sized images ensure better quality and performance.
Inserting Content Elements
After adding the logo, we’ll insert a button element. WPBakery offers various styling options for buttons, including color, size, and alignment. We’ll choose a green, large-sized button aligned to the right.
Save your changes frequently to see how your page looks in real-time. This practice helps you make adjustments as needed.
Styling Your Elements
Styling is crucial for creating an attractive landing page. WPBakery provides extensive design options for each element. You can add margins, padding, borders, and background colors to customize the appearance of your content.
For text elements, you can use the TinyMCE editor to format your text. Headings, bold text, and alignment options are readily available. Remember to use H1 tags for the main title and H2 or H3 tags for subheadings to maintain a clear hierarchy.
Now that you have the basics, let’s explore more advanced techniques to enhance your landing page.
Advanced Techniques for Enhanced Design
Beyond the basic structure and content, WPBakery allows for more advanced design elements. For instance, you can add feature boxes with icons and text blocks to highlight key points or services.
To add an icon, use the ‘Icon’ element from WPBakery’s library. You can choose from various icon libraries, such as Font Awesome, and customize the icon’s color, size, and alignment.
For feature boxes, combine icons with text blocks. Center the content and use bold text to make your features stand out. If you need to adjust text size beyond the default options, switch to the text editor and add custom CSS for font size.
Creating Spacing and Layout Adjustments
Proper spacing is essential for a clean and readable layout. Use WPBakery’s design options to add padding and margins to your rows, columns, and elements. This technique ensures that your content has enough breathing room and doesn’t appear cluttered.
For example, to add space between sections, edit the row’s design options and adjust the padding values. Adding padding at the top and bottom of a row can create a balanced and visually appealing layout.
Adding Interactive Elements
Interactive elements like toggles and accordions can make your landing page more engaging. WPBakery offers a ‘Toggle’ element that allows you to create collapsible content sections for FAQs or additional information.
To add a toggle, select the ‘Toggle’ element and enter your content. You can customize the toggle’s title, description, and appearance using the TinyMCE editor.
Integrating Contact Information and Maps
For contact information, you can use text blocks combined with icons to display your address, phone number, and email. WPBakery’s ‘Google Maps’ element allows you to embed a map with your location, making it easy for visitors to find you.
To enhance the visual appeal of your contact section, use a background color and add padding for spacing. You can also round the corners of the row using the border-radius option.
Final Touches and Call to Action
End your landing page with a strong call to action. Use a text block and button to encourage visitors to take the desired action, such as booking a service or signing up for a newsletter.
Don’t forget to add copyright information at the bottom of your page. Use a text block and center the content for a clean and professional look.
By following these steps, you can create a compelling and visually appealing landing page using WPBakery Page Builder. Experiment with different elements and styles to find what works best for your brand and audience.
Creating Additional Sections
To further enhance your landing page, consider adding sections that provide more information about your product or service. This could include testimonials, case studies, or a detailed description of your offerings.
Adding Testimonials
Testimonials are powerful tools that can build trust with potential customers. To add a testimonial section, create a new row and split it into columns if necessary. Use the ‘Text Block’ element to add customer quotes and the ‘Single Image’ element for customer photos.
- Add a new row and set the row stretch to ‘stretch row’.
- Split the row into two columns for a balanced layout.
- Use the ‘Text Block’ element to insert customer quotes.
- Use the ‘Single Image’ element to add customer photos.
Case Studies
Case studies can provide in-depth insights into how your product or service has benefited other clients. Create a new section with a background color or image to distinguish it from other sections.
- Add a new row and set the row stretch to ‘stretch row’.
- Use a background color or image to make the section stand out.
- Insert ‘Text Block’ elements to detail the case studies.
Detailed Descriptions
Provide detailed descriptions of your products or services in a new section. Use ‘Text Block’ elements for text and ‘Single Image’ elements for visuals. This helps potential customers understand what you offer.
- Create a new row and set the row stretch to ‘stretch row’.
- Add ‘Text Block’ elements for detailed descriptions.
- Include ‘Single Image’ elements for visual representation.
Designing Feature Boxes
Feature boxes highlight key aspects of your products or services. They make it easy for visitors to quickly grasp the benefits you offer.
Creating Feature Boxes
To create feature boxes, start with a new row and split it into multiple columns. Use ‘Icon’ and ‘Text Block’ elements to design each box.
- Add a new row and set the row stretch to ‘stretch row’.
- Split the row into columns (e.g., three or four columns).
- Use the ‘Icon’ element to add an icon to each feature box.
- Add a ‘Text Block’ element below the icon for descriptions.
Customizing Feature Boxes
Customization is key to making your feature boxes stand out. Adjust the colors, sizes, and alignment of the icons and text.
- Select a color scheme that matches your brand.
- Ensure icons are large enough to be easily recognizable.
- Center-align text for a clean and organized look.

Adding Frequently Asked Questions Section
An FAQ section addresses common queries and reduces the need for direct customer support. Use the ‘Toggle’ element in WPBakery to create collapsible content sections.
Creating an FAQ Section
Start by adding a new row and using the ‘Toggle’ element for each question and answer pair.
- Add a new row and set the row stretch to ‘stretch row’.
- Use the ‘Toggle’ element to create individual FAQ items.
- Enter the question as the toggle title and the answer as the content.
Styling the FAQ Section
Style the FAQ section to match the rest of your landing page. Use background colors, padding, and margins to ensure it blends seamlessly.
- Choose a background color that contrasts with the text color.
- Add padding to give the section some breathing room.
- Ensure the text is legible and easy to read.
Building a Contact Section
A well-designed contact section makes it easy for visitors to get in touch with you. Include your contact information, a contact form, and a map if applicable.
Adding Contact Information
Use ‘Text Block’ and ‘Icon’ elements to display your address, phone number, and email.
- Add a new row and set the row stretch to ‘stretch row’.
- Use ‘Text Block’ elements for contact details.
- Include ‘Icon’ elements for visual representation.
Embedding a Contact Form
WPBakery supports various contact form plugins. Choose a plugin that integrates well with WPBakery and embed the form using a shortcode.
- Install a contact form plugin (e.g., Contact Form 7).
- Create a contact form using the plugin.
- Embed the form in your landing page using a shortcode.
Adding a Map
Use the ‘Google Maps’ element to embed a map showing your location. This helps visitors find your physical address easily.
- Add a new row and set the row stretch to ‘stretch row’.
- Use the ‘Google Maps’ element to embed a map.
- Enter your address to pinpoint your location on the map.
Final Touches and Publishing
Before publishing your landing page, review it thoroughly. Ensure all elements are correctly aligned and the design is consistent.
Reviewing Your Page
Take time to review your landing page. Check for any inconsistencies in design or content.
- Ensure all text is legible and appropriately formatted.
- Check that all links and buttons are working.
- Verify that images are correctly displayed.
Testing Responsiveness
Ensure your landing page is responsive and looks good on all devices. Use WPBakery’s responsive options to adjust elements for different screen sizes.
- Switch to the responsive view in WPBakery.
- Adjust margins, padding, and element sizes for mobile and tablet views.
- Preview your page on different devices to ensure consistency.
Publishing Your Page
Once you’re satisfied with your landing page, publish it. Share the link on your marketing channels to drive traffic to the page.
- Click the ‘Publish’ button in WordPress.
- Share the link on social media, email newsletters, and other marketing channels.
- Monitor the page’s performance and make adjustments as needed.
Conclusion
FAQ’s
Q: Why is WPBakery Page Builder a good choice for creating landing pages?
A: WPBakery offers a user-friendly, drag-and-drop interface, making it accessible for beginners. Its extensive features and customization options allow for creating professional-quality landing pages without coding knowledge.
Q: Can I use WPBakery Page Builder with any WordPress theme?
A: Yes, WPBakery is compatible with most WordPress themes. However, for the best experience, it’s recommended to use a theme that specifically supports WPBakery.
Q: How do I ensure my landing page is mobile-friendly?
A: WPBakery provides responsive design options. Use these tools to adjust the layout and elements for different screen sizes, ensuring a seamless experience on mobile devices.
Similar Content
- WPBakery SEO
- Wpbakery Page Builder Testimonials Carousel: Boost Engagement Today
- How to use WPBakery SEO